Image Map

Monday, October 7, 2013

Draping The Basic Bodice: Drafting Front Bodice Sloper

Hello readers!
I have been wanting to do a tutorial series on basic pattern draping and drafting for some time now.
There is a lot of information involved and I wasn't sure how to break it all down and it seemed like such a big job. But needed.
 So today I present to you: 

DRAPING AND CREATING A BASIC BODICE SLOPER: THE FRONT
What is a sloper if you don't already know? A master pattern from which you can create many other designs from. Pretty awesome.
First I'd like to tell you a little bit about my background in pattern making, and how I originally learned to make them.
When I went to FIDM to study fashion design in the early nineties there were some very good teachers who came from a time when things were still made beautifully, with lots of attention to construction details.
One of my intructors:
Connie Amaden Crawford. If you are interested in fashion draping Connie Amaden Crawford is the author of the quintessential draping textbook, The Art Of Fashion Draping. ( affiliate link)  She has several books on pattern making, draping, pattern grading, fitting, and also a pattern line available through her website and Amazon if you would like to learn more about her.
Ms. Crawford was an exacting teacher and I learned a lot in her classes, although at the time I thought she was maybe too demanding. I stayed up many a night trying to get things just right for her class. She taught me pattern drafting, and pattern grading. 

My draping teacher was actually an elderly gentleman who always wore a suit and a pocket square with beautiful brushed back silver hair. He was very elegant and I wish I could remember his name as he worked at some very high end companies back in the fifties and sixties. Anyway, I was very well prepared when I later went on to work in the industry briefly after graduating. And even though I stopped working to be a stay at home mom,  many of the foundational lessons I learned in those basic classes were ingrained as I came back to making clothes after too many years away.

I've  been going through many of my old notes I found and textbooks to try to put something together I can present to you as a tutorial here on the blog.
Do you have a dress form and aren't sure how to use it yet?
Once you have a few basic blocks created, designing is quite simple.

Let's get started!
What do you need?
A dress form
pins
fabric
scissors 
a tracing wheel
A quilter's ruler.
a pen
paper ( I use freezer paper sometimes)
a cutting mat if you have one( helps with tracing lines.)

1. When draping a basic block, we drape only one half of the form. Later, we will cut out both sides to test the fit. But for now to drape the front, you will need a piece of fabric about 5 inches longer then the neck to waist on the form, and 5 inches wider than the center front to side seam. Before you start pinning the fabric on the form draw the CROSS GRAIN LINE near the middle of the fabric. Lay that on the form across the bust line and mark the APEX, or bust point. Pin the fabric at the apex, the center front waist, neck and apex points, making sure the fabric is on the STRAIGHT GRAIN and 45 degrees across on the center front all the way to the side seam arm plate. 

2. Next, drape the waist dart. Clip the fabric at the princess line almost to the waist line.The line going straight down on the form between the CF (center front) and side seam is the PRINCESS LINE.

3 & 4. Pin at the  side seam and center front waist points. First, make sure the fabric is falling correctly from the side seam armplate. It should hang straight down, not looking crooked.Smooth the fabric at the waist over from the center front waist and put a pin at the princess line. Now smooth the fabric over from the side seam waist to the princess line/ waist point. The fabric will gap because of the bust and that extra fabric will form the front waist dart. Fold the excess over and pin it shut.
The bigger the bust, the bigger the dart!

BTW my dress form is wearing a bra because it's the same measurements as me except for there, so I padded it out with my bra. I do have a tutorial for padding your dress form if you find you are a little too curvy for it. My waist is a tiny bit bigger,  and my shoulders are more narrow so when I make my final muslin, I will fit it on myself and make a few small adjustments.
To see my blog on customizing your dress from click here.
5. Pin at the side seam armplate and smooth the fabric up and over the armplate towards the neck. Draping feels like sculpting, smoothing things carefully, then pinning them.

6. Use your pencil to trace the side seam, waist seam and neckline. Clip into the fabric at the neckline to smooth out the neckline drape. Now pin at the shoulder armplate point and pin the excess fabric that has gathered up there between the should arm point and neck point into another dart on the princess line. Pin it closed. Mark the armplate screw and the middle of the armplate between the shoulder and side seam. Make sure you mark the spot where each dart ends as well as each dart leg.

7& 8 .TRUE UP meaning draw lines in with a  ruler, your rough lines you made on the dress form.


You are probably wondering what the deal is with that shoulder dart about now, right? Will you have a  weird dart at your shoulder ? Nope. We are going to slash the pattern and pivot the dart excess into the bottom dart. Another method is to pivot the shoulder dart into the armhole. Some designs need you to use a two dart basic bodice sloper as your foundation, and some need a one dart sloper as a foundation. Today we are making a one dart sloper. ...

REDRAW the dart, ending it at the apex on the crossgrain line. Keep the dart the same at the bottom of the dart legs.

Now... iron your fabric pattern, and tape it to paper. If you have  a cutting mat place it under the fabric between it and the paper. Use your TRACING WHEEL to trace the pattern lines. When you remove the fabric, you will see all of the little dots impressed in the paper and will need to trace them with your pencil and ruler, making sure to trace in the new darts. My camera couldn't pick up the details. They are hard to see.
9. Above is my traced and trued pattern piece. To move the shoulder dart, cut through the CENTER of both darts until almost touching the apex. Pivot the top dart closed. The bottom dart will automatically become wider! COOL, isn't it!? Once my dart was closed and my bottom dart got really big, I patched it from behind with some scratch paper. See number 13 below.
10. SQUARE the edges of the pattern. I show this before I changed the dart but it doesn't matter.

11. Time to add some FUNCTIONAL EASE. This keeps you from feeling like you are wearing an Elizabethan corset. Minimum ease recommended in the bust area is two inches for comfort. Also now is the time to lower the armhole a bit, too. Make a mark one inch under the armhole and 1/2 inch out from the side seam. Redraw your armhole. If you have a FRENCH CURVE ruler, it's very helpful. I couldn't find mine so I just drew it free hand. Now you can lower your neckline about 1/4 inch as well.I also added 3/8 inch seams all around the pattern.

12. To finish the dart you redrew you will need to fold the dart closed and cut along the seam line you drew at the waist. When you open it , it will look like a typical dart.
 So there is my rough front bodice sloper. Join me tomorrow to see how the back bodice is made.
Then I will make a final muslin, work out any kinks and transfer that to Manila paper.
If you have any questions leave a comment!

Are you new to Sew Country Chick and would like to keep up with the weekly tutorials and handmade goodness? Sign up for an e mail subscription here!

Saturday, October 5, 2013

Black Ninja Assasin Costume


 Last year when Lily told me she wanted me to make her a Black ninja assassin costume I raised my eyebrows and thought to myself...."hmmmmmm."
"Sounds challenging...."

And the perfect opportunity to experiment with some black faux leather stretch fabric I bought downtown for 2 dollars a yard that had been donated from the workshop of the BEBE design room, a chain shop catering to cheesy, super sexy, and age inappropriate fashion knockoffs for teens.

Now that I look back, I wonder if it had something to do with the rough school year she was having, her wanting to be a black ninja assassin for Halloween, that is.
Or maybe she watched a ninja movie with her big brother when I wasn't home....

Oliver is his thrown together explorer costume. Always putting something together at the last minute.
 Characters from the film Ninja Assassin- Korean
  Lily drew a picture of what she wanted, and I set about figuring how to construct it. 
I traced some of her pants and a long sleeved t shirt, and connected them to make a jumpsuit pattern.
I made the top wrap around because that was a part of Lily's design.
Then I created a hood pattern using a pattern I had.
I made a hole on the top of the hood to put her pony tail through.
I think she looks really tough!
 Don't even think about messing with this girl.
 That's actually a real sword cover on her hip there. A souvenir from a trip to Japan. Sword not included on hip... But she wanted to use it. Too sharp.
I have to draw the line somewhere.
I still have the Stitched Blooms book giveaway up so stop by and enter here!
Are you new to Sew Country Chick and would like to keep up with the weekly tutorials and handmade goodness? Sign up for an e mail subscription here!

Tuesday, October 1, 2013

Stitched Blooms Book AND Embroidered Glass Case Giveaway!

  I am so excited to be able to offer one of my lucky readers a free copy of Stitched Blooms by Carina Envoldsen-Harris.
Plus the winner also will get an actual project from the book!
Read on....

 Stitched Blooms is a beautiful new embroidery book by Embroiderer Carina Envoldsen_ Harris. It's 300 designs and motifs feature lovely floral designs, some with a folk art feel I love.
I received a copy of the book myself from Lark Books last week and it's one of those pretty books that gets you really excited about making the projects in the book. I am looking forward to trying some of the projects, especially since finding several vintage embroidery hoops at an estate sale last week. There are over 20 projects in the book and there are even more designs, over 300, on the accompanying CD. The directions are clear, even for a beginner like myself. There are a variety of designs geared for all levels of hand embroiderers.
I think I may try to make a Mexican style top with embroidery on the yoke.


 I also love that horse,calendar and tote bag!


 If you would like to learn more about the book and author you can check out Carina's About Stitched Blooms page on her blog.


 As a bonus the winner of this giveaway is also going to get a project made from the book..
This pretty spectacles case below. Isn't that cool?
To enter my giveaway please leave a comment and let me know if you are a beginner at embroidery , a more advanced embroiderer or maybe you have never even tried it! That's OK too.

 To sign up please leave a comment then fill out my Rafflecopter widget.
I promise I don't distribute anyone's e mail. It's just an easier way for me to run giveaways.
Thank you!
a Rafflecopter giveaway  
This giveaway ends a week from today. 
Only the comment is mandatory to enter. The other options give extra votes.


Reprinted with permission from Stitched Blooms © 2013 by Carina Envoldsen-Harris, Lark Crafts, an imprint of Sterling Publishing Co., Inc.
Are you new to Sew Country Chick and would like to keep up with the weekly tutorials and handmade goodness? Sign up for an e mail subscription here!

Sunday, September 29, 2013

Vintage Fabric Collecting Adventures


I have been going a little wacko with my fabric collecting the past few months. I don't spend anything on new stuff really, and actually I spend very little on fabric at all, but somehow I have amassed tons of it!

Here's one story: The artistic director of the theater where I occasionally work as a costumer e-mailed me to say the lighting director's father had gone into a nursing home and they had to get rid of his deceased mother's fabric collection. Could I stop by that day to look it over and take what I wanted before they donated it all? The director had also let the other costume designers know about it, but most of them live far from our little town. Lucky for me I was ten minutes away. I was going to be be the first person on the scene. I didn't have any important plans (besides having a dinner party in exactly two hours with people my husband had invited and who I hadn't met yet. ) Actually, I still had to go to the grocery store because I hadn't even bought the groceries for the dinner yet, but hey, I could spare a few minutes to look through approximately forty draw string tied Hefty bags of fabric couldn't I ? OF COURSE I COULD!!


As I read this e mail to my 10 year old over our usual chicken burritos at La Terraza she said. "Mommy, you have that look in your eyes again." She thinks I have a problem. She's probably right. I dropped the girls off at home after we finished our burritos and then headed to the theater. When I was let into the room with the fabric my jaw almost dropped. I was shown piles of bags and boxes of vintage patterns and asked to try to not make much noise because there was a matinee going on through the partition wall. Then the door closed and I was alone with a mountain of fabric and exactly forty minutes to go through it all because I had to get back for my dinner party and still go to the store. My hands were shaking as I tried to neatly go through the piles and tie up the bags neatly afterwards as I piled up linens, striped cotton knits and funky sixties and seventies prints. It was like a dream!
  
But what am I going to do with all of this fabric now???

On Fridays I go to estate sales and this is where I buy most of my vintage fabrics and craft supplies. I have a post about my estate sale shopping adventures here. Sometimes it's just a wee bit morbid going to estate sales. Lily gets kind of creeped out going through old people's things so I don't bring her anymore. Gigi loves it, but I worry she is going to end up an eccentric like me if I keep bringing her.

 I also find other cool things besides fabric. Like this past week I bought several rolls of sixties wall paper for two dollars. I can't wait to make something with it! However, most of the time I don't really find much, maybe a small bag of zippers and bias binding, or some wooden embroidery hoops. 

This past Friday I was in a house and there was a bag of embroidery stuff for sale. There was a beautiful embroidery project still in it's hoop that was almost finished, except for one letter that hadn't been embroidered. It said, "Families Are Forever." I thought about the old woman lovingly made it  and now her unfinished project was lying there at her estate sale. I picked it up to buy it so I could finish the embroidery for her, but there was a big stain on it. So I didn't. But I really felt for her.

I figured it's about time I share some of my vintage fabric goodness with the world at large and so I'm starting to sell little things to make and put in my Etsy shop which isn't up and running yet, and I have two craft fairs coming up. Just taking the pictures themselves and writing all of the details is so time consuming, almost more than making everything!

Here are a  few things I made this week with some of my vintage fabrics. And lots more in the making!


Are you new to Sew Country Chick and would like to keep up with the weekly tutorials and handmade goodness? Sign up for an e mail subscription here!

Saturday, September 28, 2013

Melissa From Melly Sews : Paying Me a Visit

Hi Sew Country Chick readers! I'm Melissa, and I blog at Melly Sews and design Blank Slate Patterns. Sewing Summit was the second time I got to meet Justine, (the first time was at LA Fabric Weekend) and so today I'd like to tell you some things about her.

Top 5 things you should know about Justine

5. She is super friendly. I ran into her at the train station and we took the train together from the airport to our hotel. When we got off, I immediately consulted my phone to figure out where we were/where we needed to go. Not Justine. She walked up to the first person she saw and asked. And when that girl didn't know, she proceeded to the next person. I think we figured out directions at the same time, but through totally different methods. sewing-summit-melissa 
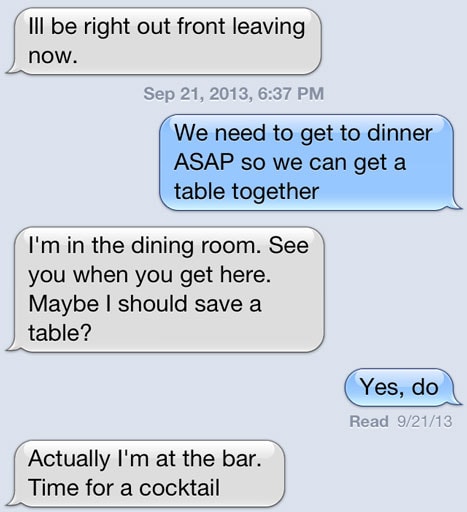
4. She is way more impulsive than me. I think she decided to come to Sewing Summit like 4 days before it actually started. Also see this actual text exchange between us (I'm in blue) for an example. photo-1
See what I mean? I joked a couple of times that she reminds me of Dory from Finding Nemo. Not a planner like me. More of a party girl, grown up. And lots of fun. 3) She was studious in classes (while making new friends). sewing-summit-melissa-3 
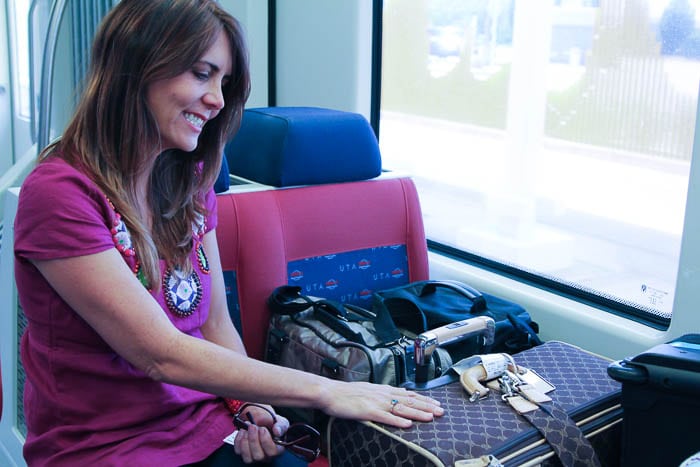
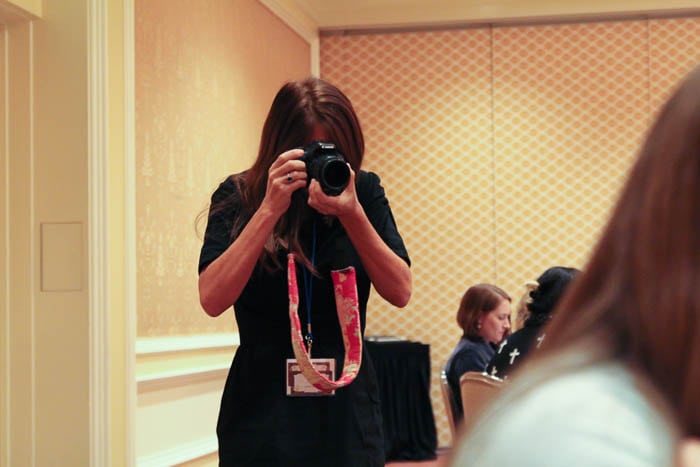
2. She was our own personal paparazzi - never forgot her camera (I was guilty of that) and often the best picture I could get of her was this one. sewing-summit-melissa-4 So I'm sure her post has way more photos than mine! 
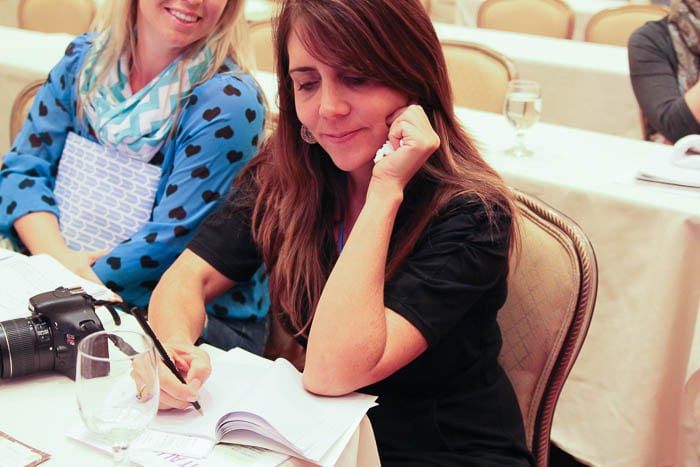
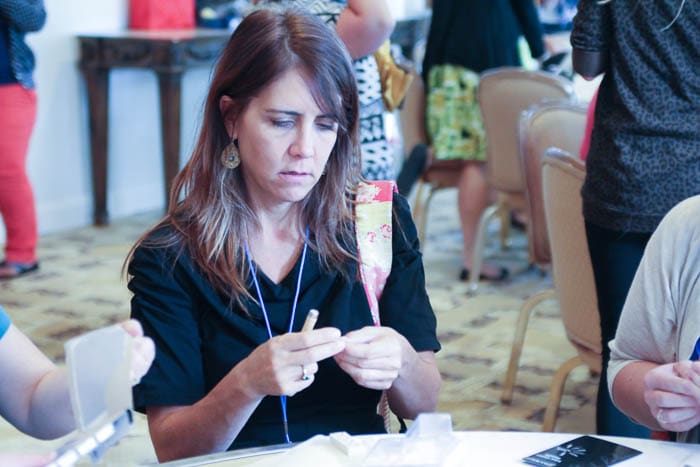
1. Justine really tries to do her best at whatever she's doing. See the studied concentration during the handprinting fabric class? Justine has great stories about growing up in LA and she is definitely a citizen of La-la land (as we lovingly refer to LA in Austin) but she also has a passionate streak, as I'm sure her loyal blog readers have noticed. She was constantly asking questions, networking (through her natural friendliness) and trying to improve. And I am so glad we got to hang out last weekend, privileged to call her a friend and thrilled to steal her blog and tell you about her. sewing-summit-melissa-5 I hope we get to meet up again in person sometime soon, and if you're curious about what Marissa of Rae Gun Ramblings wrote about me, come on over to my blog.
Facebook Pinterest Instagram Twitter

Here is a list of all of the bloggers involved in our stalking project and links to their posts today
 
Marissa of Rae Gun Ramblings writes about Melissa of Melly Sews
Jessica of Running with Scissors writes about Jen of I Candy Handmade
Melissa of Melly Sews writes about Justine of Sew Country Chick 
Caila of Caila Made writes about Veronica of Sew Very
Veronica of Sew Very writes about Jessica of Running with Scissors
Justine of Sew Country Chick writes about Caila of Caila Made
Jen of I Candy Handmade writes about Sabra of Sew a Straight Line
Sabra of Sew a Straight Line writes about Marissa of Rae Gun Ramblings

Friday, September 27, 2013

Icon Wall Sticker Winner

Congratulations to Olivia Hamilton!! You won the gift certificate from Icon Wall Stickers! I will be in contact with you! Have a great weekend!


Are you new to Sew Country Chick and would like to keep up with the weekly tutorials and handmade goodness? Sign up for an e mail subscription here!

Wednesday, September 25, 2013

Draping A Basic Block From A Dress Form


Today I'm draping a basic child's pattern block size 5 from my dress form.

If you sew, do you have a basic block yet? Learning how to make a basic block and then how to create some basic designs with it is one way to create your own patterns.
There are two ways to make your basic, whether you are making it for yourself, your child, or in my case, creating a pattern that you can eventually sell. ( Or maybe just give away.)

You can make a flat pattern, or you can drape your original block on a dress form like I did here.
If you are creating a pattern only for yourself or for your child, then I would recommend making a flat pattern based on the individual's measurements. If you are making a flat pattern, you will need a fit model to try the pattern on as you go, to make sure everything fits right.

If you want to make a pattern to fit different sizes, it's recommended you use a general size chart or a dress form . 


size chart courtesy of pattern.stringcodes.com
Commercial dress forms are created with industry sizing standards so you will have an industry standard fit in a range of sizes once it is graded.

What if you are NOT an average size, for instance, a very thin tall person with wide shoulders, or a busty, short person, or have a chunky child, and you draft a pattern based on that basic block you drafted for those not typical measurements then grade it up or down several sizes? Then you will have a pattern that will only fit a specific body type well. You may have some complaints if you try to sell that pattern.

For instance, I love Colette Patterns because they fit me very well in the bust area. I'm full busted for my figure, and it's very unusual to find a pattern that fits in that area without doing a Full Bust Adjustment or other alterations like lengthening the pattern in front, but Colette patterns fit perfectly. I have a feeling the original fit model for Colette Patterns was probably busty. Not the best news for smaller busted women, but great for me!

Most commercial patterns and clothing you find in stores for women are drafted for the average size B cup for women.

So let's see how I drafted my pattern, shall we?

I always mark GRAINLINES first, to make sure my pattern is on grain and balanced.
I line up my center front and back first and pin them down.
Then I smooth over the fabric as I go, pinning.
Making sure my CROSSGRAIN is straight, I  finish draping the basic bodice, clipping into the neck line and pinning and marking around the armholes. I use the flat part of the pencil to trace the side and shoulder seams on the form. It's very straightforward for this size 5 child's dress form. No darts.
I pin it together and readjust the fit. I had to make the armholes bigger.
After studying children's patterns I've learned learned that the average ease for a child's basic block is 2 inches. This allows for comfort and wiggle room.
Below is a chart I unearthed giving ease allowances for average ladies patterns.
That's a lot of ease!
Every designer has their own opinion about ease. I prefer close fitting clothing myself so I would use a minimum amount.

Then at this point I take off the pattern pieces and TRUE them up, using a ruler. I can add about 1/4 to 1/2 inch at the side seams to build in some ease one to two inches, to the basic pattern at this point. By the way, that 2 inches of ease is for woven patterns only. If you are making a knit pattern, there isn't as much. Sometimes knit patterns like bathing suits have NEGATIVE EASE, meaning the pattern is smaller than the body.
But the subject of ease needs it's own blog post!
 I also make sure all of my seams are the same length on both pieces, ( side seams, shoulder seams.)

I tape my pattern to manila and cut it out.
Below is my basic block. I don't add seam allowances to my basic block. I add them after I design. This makes it simple to slash and spread, etc.
Stay tuned in the next couple of weeks to see how I use the basic block to create a dress, and then how I grade it with a grading ruler.
Thanks for reading!
Here is link to another post I wrote last year where I made a basic pattern block based on the directions from a book and using Gigi's measurements as a guide:


Are you new to Sew Country Chick and would like to keep up with the weekly tutorials and handmade goodness? Sign up for an e mail subscription here!
Related Posts Plugin for WordPress, Blogger...